3D Printing Ceramics and Potteries With Clay
Publié par menglisa le
Potteries/ceramics are very suitable for daily use. They are durable, heat resistance, high mechanical strength, sustainable, low price, and environmental-friendly. We know that potteries and ceramics are made by clay. But What is clay?
Clay is a natural material with good plasticity. It sometime shows the colors of yellowish-brown, grayish-white, reddish-purple and other tones. It is soft and malleable when we soak it with water, and it will become hardened if we fire it at high temperatures in a microwave or in a Kiln factory. All these Characteristics makes it a very practical material for making tableware.


What are the differences between pottery and ceramics?
There are different definition of pottery and ceramics, any many people may say that they are big differences between them. Someone says that pottery and ceramics are the same. We are agree on this.
In China, the clay commonly used in the ceramic industry are Kaolin, Ball Clay), and Bentonite. In the United States or European countries, there are mainly three types of clay for making pottery/ceramic. These are earthenware, stoneware, porcelain and ball clay.

Earthenware clay: the most common and beginner-friendly clay. It has an earthy look (colors like brown, red, orange, or gray.) Pottery that made by Earthenware is more fragile than porcelain and stoneware. It is liquid penetratable. In order to make it watertight, some people will glaze the Earthenware pottery. Today, pottery is often used to grow pottery pots for plants and other household items.

Stoneware clay: it gets its name from its stone-like qualities: hard, and nonporous. Usually, its color is buff or tan. Stone pottery is strong, hard, impervious, and more uniform in heat dissipation and heat preservation.

Porcelain clay: It is usually pale gray or white. Porcelain became popular in Europe and North America in the 17th century. Porcelain can be shaped into a more exquisite shape than Earthenware pottery or Stoneware pottery. Today, Porcelain pottery is often used as Tableware.

Ball Clay: It get its name at England, becuase of its ball-shape after manual and machine processing. There are a variety of colors, mainly black and gray. After firing, it is white, yellow and ochre with different impurity content. It is soft and viscous.

How to use a 3D printer to print ceramics?
Mainly, there are six steps to make potteries with a ceramic 3d printer:
1. Prepare the 3d mode on your computer. You can design 3d printing model on your computer, or download the model file from the internet, then slice it with slicing software.

How to slice a ceramic model with Cura
2. kneading/stretching the wet clay and load the clay into the barrel. Please soak the clay in water for 2 to 3 hours, then mix it evenly and put it into the barrel. Please note that after loading the clay into the barrel, be sure to squeeze the air and bubbles out of the barrel before 3D printing. The purpose of kneading/stretching the wet clay is to squeeze out the bubbles in the clay and make sure the clay has a good consistency. If there are bubbles in the clay, the pottery body can easily break and deform after firing at the microwave.


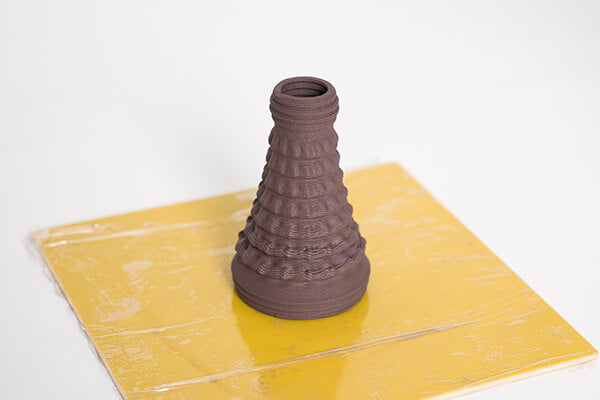
3. Start you 3D printing with the wet clay. Use ceramic 3D printing to print out the pottery you designed. The newly printed ceramics are still wet and brittle.The newly printed potteries are still flexible. You can modify it by hand or by tools to customize creative prints as needed.

4. Let the newly printed pottery dry naturally. Please don’t expose the newly printed clay to the sun directly.
When the water in the clay evaporates, the ceramics will harden, and there will be small holes on the ceramic surface, which is beneficial to absorb the ceramic glaze.

5. Glaze the pottery. Glazing is the application of ceramic glaze on the surface of ceramics. It can increase the water resistance and color of ceramics. Glazes can protect your porcelain and prevent liquid from entering the inside of the porcelain.
Ceramic glazes are matte and glossy.

6. Fire the pottery in the microwave. You need to put the clay into the filn first, and then turn on the microwave to fire it for 30-40 minutes.
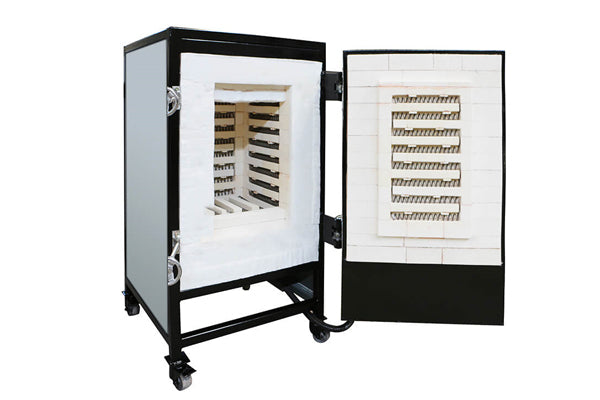
After glazed at high temperature, the pottery will look shiny and is smoother on its surface. Or you can use an electric heated furnace or kiln to fire the cermaic and pottery

fire the pottery with a microwave after 3d printing

fire the pottery with an electric heated furnace or kiln
Ceramic 3D printing with Tronxy 3D printer model Moore 1
What is ceramic glaze?
The glazes applied on ceramics are generally made of quartz, feldspar and clay, which are ground and watered, then coated on the surface of the green body and melted after firing at a certain temperature.
The firing process at high temperature makes them stiffer than glass.
When the temperature drops, a thin vitreous layer on the ceramic surface is formed. It makes the ceramics impervious, smooth and glossy, not easy to stain. It can improve the mechanical strength, thermal stability and chemical stability of the products.
Our daily use of ceramics, generally put on a “dress”, especially daily ceramics. some as white as jade, some colorful. This kind of ceramic dress is called “glaze”.

ceramic glazing

3D printing a ceramic by tronxy 3d printer
You know how a pottery/ceramic is printed with a 3d printer. Now, it is time to empower your creativity with a ceramic 3D printer and make your most favorite masterpieces.
If you want to know more about this ceramic 3d printing, please leave comments. Maybe we can discuss them in the following article.
← Message plus ancien Message plus récent →
2 commentaires
-
I18n Error: Missing interpolation value "auteur" for "{{ auteur }} le {{ date }}"
Heyaa i’m for the first time here. I found this board and I find It
truly useful & it helped me out much. I’m hoping to provide one thing
again and aid others likme you helped me. https://casinoapp.webgarden.com/

I would love to see more detailed articles regarding the workflow required to successfully use the Moore 1.